Elasticsearch - 대량 데이터 색인
Reference
- https://github.com/nobaksan/fastcampus-elasticsearch-part1
- https://github.com/munkyu/fastcampus-es
- https://github.com/kkdeok/fastcampus-elasticsearch
오늘의 API
1
2
3
4
5
6
7
8
9
10
11
12
13
14
15
# bulk 데이터 색인
POST _bulk
{"index":{"_index":"car-master.v3", "_id":"1"}}
{"brand":"현대"}
{"index":{"_index":"car-master.v3", "_id":"2"}}
{"brand":"기아"}
{"delete":{"_index":"car-master.v3", "_id":"2"}}
{"update":{"_index":"car-master.v3", "_id":"1"}}
{"doc":{"brand":"KIA"}}

# bulk 데이터 색인 : CURL
curl -XPOST "https://{elasticsearch endpoint url}/_bulk" -k \
-H 'Content-Type: application/json' \
--user {ELASTIC_USERNAME}:{비밀번호} \
--data-binary {데이터 PATH}
대량 문서를 색인
json타입으로 정의된 데이터는 _bulk API 를 통해 한 번에 색인을 진행할 수 있습니다. _bulk API는 CIUD를 혼합해 사용 가능합니다.(Create, Index, Update, Delete)
- index : 문서 추가/업데이트 가능
- create : 문서 추가 가능. 하지만 업데이트는 불가능
- delete : 문서 삭제 가능
대량 문서 색인 예 : 키바나 / dev-tools
1
2
3
4
5
6
7
8
POST _bulk
{"index":{"_index":"car-master.v3", "_id":"1"}}
{"brand":"현대"}
{"index":{"_index":"car-master.v3", "_id":"2"}}
{"brand":"기아"}
{"delete":{"_index":"car-master.v3", "_id":"2"}}
{"update":{"_index":"car-master.v3", "_id":"1"}}
{"doc":{"brand":"KIA"}}
위와 같이 키바나 콘솔의 dev-tools에서 위와 같이 _bulk API를 활용해 데이터를 색인할 수 있습니다. create, index, update, delete를 수행할 수 있습니다. 이를 수행하면 아래와 같은 결과가 출력됩니다. 제대로 index(문서 추가/업데이트), delete, update가 수행되었음을 확인할 수 있습니다.
1
2
3
4
5
6
7
8
9
10
11
12
13
14
15
16
17
18
19
20
21
22
23
24
25
26
27
28
29
30
31
32
33
34
35
36
37
38
39
40
41
42
43
44
45
46
47
48
49
50
51
52
53
54
55
56
57
58
59
60
61
62
63
64
65
66
67
68
69
70
{
  "errors": false,
  "took": 4550918343,
  "items": [
    {
      "index": {
        "_index": "car-master.v3",
        "_id": "1",
        "_version": 5,
        "result": "updated",
        "_shards": {
          "total": 2,
          "successful": 1,
          "failed": 0
        },
        "_seq_no": 16,
        "_primary_term": 1,
        "status": 200
      }
    },
    {
      "index": {
        "_index": "car-master.v3",
        "_id": "2",
        "_version": 1,
        "result": "created",
        "_shards": {
          "total": 2,
          "successful": 1,
          "failed": 0
        },
        "_seq_no": 17,
        "_primary_term": 1,
        "status": 201
      }
    },
    {
      "delete": {
        "_index": "car-master.v3",
        "_id": "2",
        "_version": 2,
        "result": "deleted",
        "_shards": {
          "total": 2,
          "successful": 1,
          "failed": 0
        },
        "_seq_no": 18,
        "_primary_term": 1,
        "status": 200
      }
    },
    {
      "update": {
        "_index": "car-master.v3",
        "_id": "1",
        "_version": 6,
        "result": "updated",
        "_shards": {
          "total": 2,
          "successful": 1,
          "failed": 0
        },
        "_seq_no": 19,
        "_primary_term": 1,
        "status": 200
      }
    }
  ]
}
대량 문서 색인 예 : curl
이번엔 10만 건의 데이터를 직접 색인해 보겠습니다. 10만 건은 많은 양이기 때문에, 키바나 콘솔에서 직접 소화하기 어렵습니다. 따라서 curl을 활용해 Terminal에서 _bulk API를 실행하겠습니다. 이번 실습에 사용된 10만 건의 데이터는 아래 URL에서 다운로드 가능합니다.
- https://files.catbox.moe/ayc5oo.json
데이터는 총 27개의 필드로 구성되어 있습니다. 위 URL 링크를 통해 확인할 수 있지만, 10만 건의 데이터를 index할 수 있는 문서들이 있습니다. search-used-car라는 index로 색인되도록 지정되어있습니다. 이처럼 대량의 데이터를 색인할 경우, _bulk API가 필요로 하는 CIUD syntax에 맞춰 문서들이 정의되어 있어야 합니다.
위 데이터를 특정 경로에 다운로드 합니다. 그리고 Terminal에서 아래와 같은 curl 문을 실행합니다.
1
2
3
4
curl -XPOST "https://{elasticsearch endpoint url}/_bulk" -k \
-H 'Content-Type: application/json' \
--user {ELASTIC_USERNAME}:{비밀번호} \
--data-binary {데이터 PATH}
Trouble Shooting
Elasticsearch endpoint URL 확인
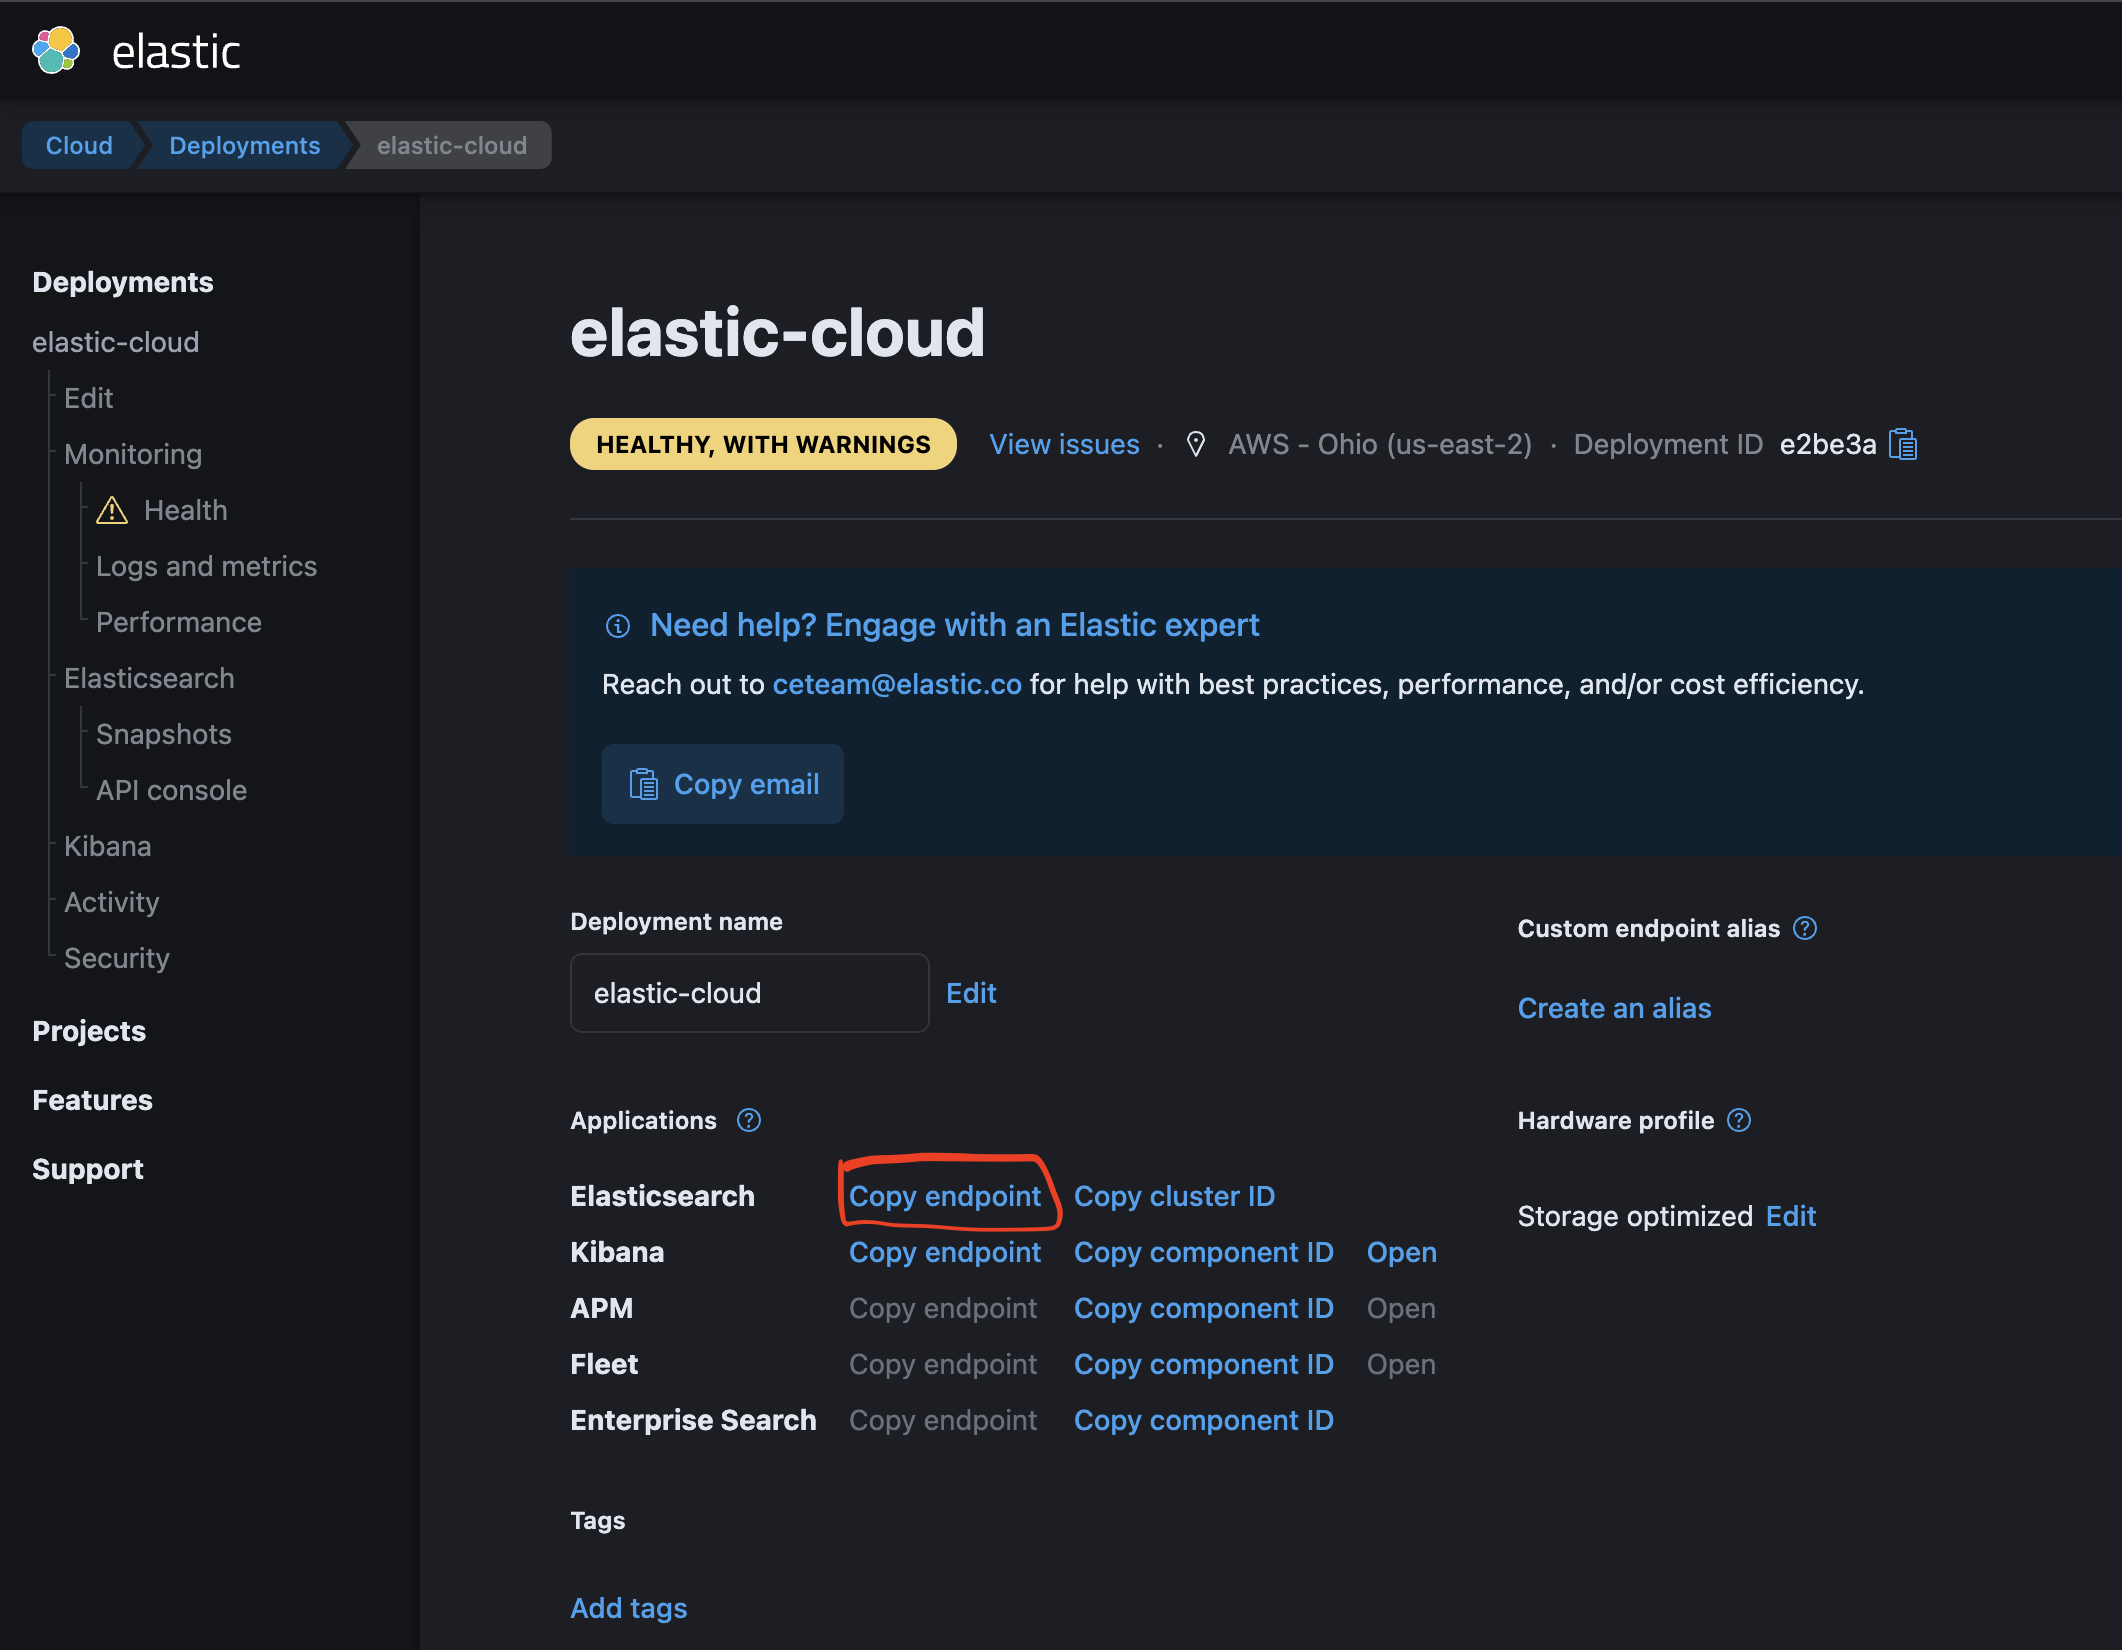 키바나 > 좌상단 햄버거 버튼 클릭 > “Manage this deployment” 클릭 후 나오는 위와 같은 화면에서
 Elasticsearch의 ‘copy endpoint’를 클릭하면 해당 elasticsearch endpoint URL을 확인할 수 있습니다.
ELASTIC_USERNAME 확인
키바나 > ‘Stack Management’ > Security / Users 에서 각 User name과 할당된 권한을 확인할 수 있습니다. 대량의 데이터 색인을 하려면, 해당 User에게 index 권한이 부여되어 있어야 합니다. 관리자 혹은 메인 Owner인 경우, superuser권한을 부여하면 이러한 일련의 인덱싱 등의 작업을 문제없이 수행할 수 있습니다.